
5 posts tagged with "gitlab"

View All Tags

· 2 min read
Jeffrey Aven

With our StackQL Provider Registry, we had an interesting challenge:

  1. Maintain different versions for one or more different documents in the same repo(which were decoupled from releases)
  2. Provide dynamic versioning (with no user input required and not dictated by tags)
  3. Maintain some traceability to the source repo (pull requests, commit shas, etc)

SemVer required users to make arbitrary decisions on major, minor, and build numbers.

Although CalVer required less user discretion for the major and minor components, the micro-component was still an arbitrary number. This was not ideal for our use case.

As our document versioning was not related to tags, and we have implemented GitFlow (specifically based upon PRs to dev or main) as our release path, we created a new variant scheme... GitVer.

This is completely different from GitVersion, which is a tool to determine the version of a project based on Git history.

This scheme is implemented using GitHub as the remote but could easily be adapted to GitLab, Bitbucket, etc.

How it works

Each pull request is assigned a version based on the date the PR was raised or merged, and the PR number. This version (the GitVer) can then be used to version artifacts (which could be pushed to releases if desired).

Workflow Example Code

This is an example using GitHub actions. The version is determined automatically within the workflow.

main.yml example:

The code used to get the relevant PR info is here (setup-job.js), the tricky bit is that the PR number presents differently for a pull request open or sync (pushing changes to an open PR) and a merge commit (which is simply a push to a protetcted branch). See the code below:

tip

you can export some other metadata while you are here like the commit sha, source and target branch, (PR) action, etc.

The code to generate the GitVer for the PR is here (get-version.js):

You can see it at work here stackql/stackql-provider-registry which builds and deploys providers for StackQL.

Thoughts?

if you have enjoyed this post, please consider buying me a coffee ☕ to help me keep writing!

· 7 min read
Chris Ottinger

Prefect.io is a python based Data Engineering toolbox for building and operating Data Pipelines. Out of the box, Prefect provides an initial workflow for managing data pipelines that results in a container image per data pipeline job.

The one-to-one relationship between data pipeline jobs and container images enables data engineers to craft pipelines that are loosely coupled and don't require a shared runtime environment configuration. However, as the number of data pipeline jobs grow the default container per job approach starts to introduce workflow bottlenecks and lifecycle management overheads. For example, in order to update software components used by flows, such as upgrading the version of Prefect, all the data pipeline job images have to be rebuilt and redeployed. Additionally the container image per job workflow introduces a wait time for data engineers to re-build data pipeline container images and test flows centrally on Prefect Server or Prefect Cloud environment.

Fortunately, Prefect comes to its own rescue with the ability to open up the box, exposing the flexibility in the underlying framework.

Out of the box - Prefect DockerStorage

Out of the box, Prefect provides a simple workflow for defining and deploying data pipelines as container images. After getting a first data pipeline running in a local environment, the attention turns to scaling up development and deploying flows into a managed environment, using either the Prefect Cloud service or a Prefect Server.

Combining Prefect Cloud or Prefect Server with Kubernetes provides a flexible and scalable platform solution for moving data pipelines into production. There are a number of options for packaging data pipeline flow code for execution on kubernetes clusters. The Docker Storage option provides the workflow for bundling the data pipeline job code into container images, enabling a common controlled execution environment and well understood distribution mechanism. The data pipeline runs as a pod using the flow container image.

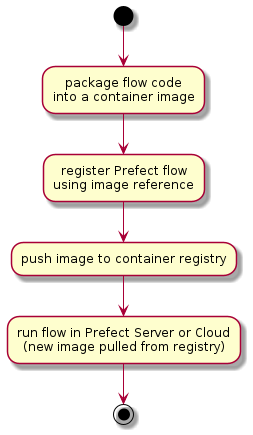
Prefect Docker Storage workflow steps for building and deploying data pipeline flows include:

Workflow Steps

  • packaging a flow (python code) as a serialised/pickled object into a container image
  • registering the flow using the container image name
  • pushing the container image to a container repository accessible from the kubernetes cluster
  • running the flow by running an instance of the named container image as a kubernetes pod

This is relatively simple immutable workflow. Each data pipeline flow version is effectively a unique and self contained 'point-in-time' container image. This initial workflow can also be extended to package multiple related flows into a single container image, reducing the number of resulting container images. But, as the number of data pipeline jobs grow, there issues of container image explosion and data engineering productivity remain.

Using Prefect GitStorage for flows addresses both container image proliferation as well as development bottlenecks.

Prefect Git Storage

Prefect Git Storage provides a workflow for developing and deploying data pipelines directly from git repositories, such as Gitlab or Github. The data pipeline code (python) is pulled from the git repository on each invocation with the ability to reference git branches and git tags. This approach enables:

  • reducing the number of container images to the number of different runtime configurations to be supported.
  • improving the data engineering development cycle time by removing the need to build and push container images on each code change.
  • when combined with kubernetes Prefect Run Configs and Job templates, enables selection of specific runtime environment images

Note that the GitStorage option does required access from the runtime kubernetes cluster to the central git storage service, e.g. gitlab, github, etc.

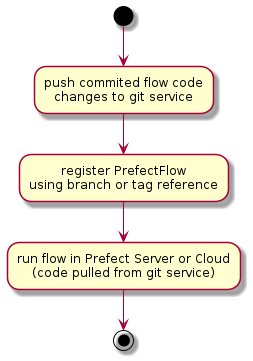
Prefect Git Storage workflow steps for 'building' and deploying data pipeline flows include:

Workflow Steps

  • pushing the committed code to the central git service
  • registering the flow using the git repository url and branch or tag reference
  • running the flow by pulling the reference code from the git service in a kubernetes pod

The container image build and push steps are removed from the developer feedback cycle time. Depending on network bandwidth and image build times, this can save remove 5 to 10 minutes from each deployment iteration.

Pushing the flow code

Once a set of changes to the data pipeline code has been committed, push to the central git service.

$ git commit
$ git push

Registering the flow

The flow can be registered with Prefect using either a branch (HEAD or latest) or tag reference. Assuming a workflow with feature branches:

  • feature branches: register the flow code using the feature branch. This enables the latest version (HEAD) of the pushed flow code to be used for execution. It also enables skipping re-registration of the flow on new changes as the HEAD of the branch is pulled on each flow run
  • main line branches: register pinned versions of the flow using git tags. This enables the use of a specific version of the flow code to be pulled on each flow run, regardless of future changes.

Determining the which reference to use:

# using gitpython module to work with repo info
from git import Repo

# presidence for identifing where to find the flow code
# BUILD_TAG => GIT_BRANCH => active_branch
build_tag = branch_name = None
build_tag = os.getenv("BUILD_TAG", "")
if build_tag == "":
branch_name = os.getenv("GIT_BRANCH", "")
if branch_name == "":
branch_name = str(Repo(os.getcwd()).active_branch)

Configuring Prefect Git storage:

from prefect.storage import Git
import my_flows.hello_flow as flow # assuming flow is defined in ./my_flows/flow.py

# example using Gitlab
# either branch_name or tag must be empty string "" or None
storage = Git(
repo_host=git_hostname,
repo=repo_path,
flow_path=f"{flow.__name__.replace('.','/')}.py",
flow_name=flow.flow.name,
branch_name=branch_name,
tag=build_tag,
git_token_secret_name=git_token_secret_name,
git_token_username=git_token_username
)

storage.add_flow(flow.flow)
flow.flow.storage = storage

flow.flow.regsiter(build=False)

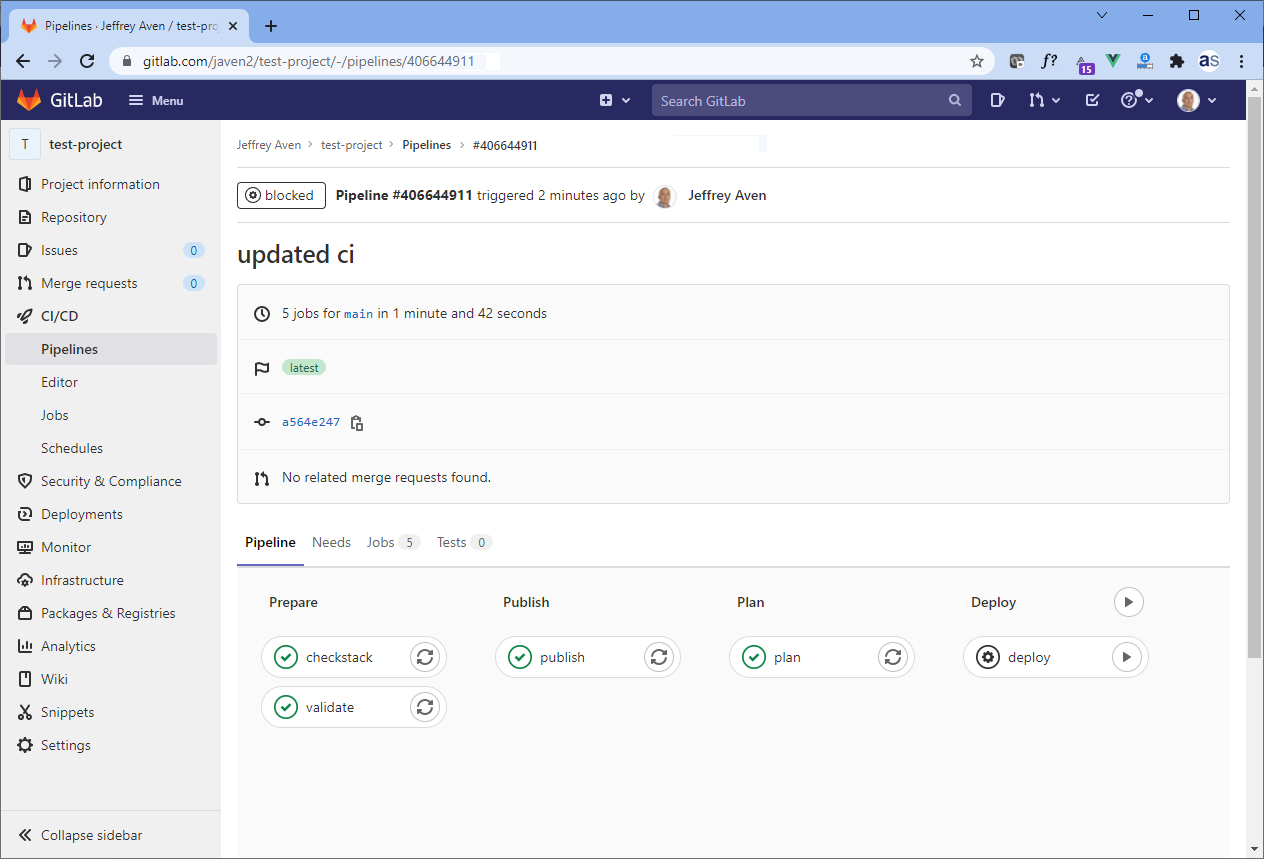
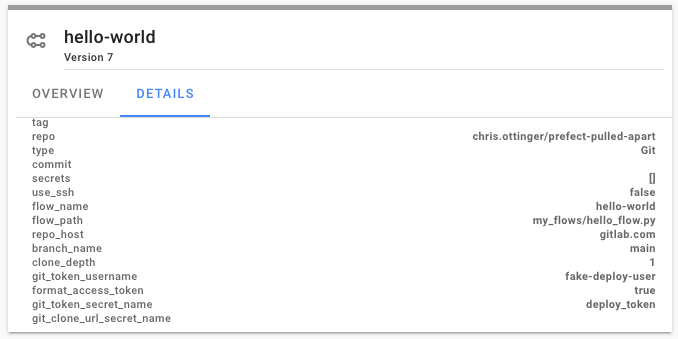
Once registered, the flow storage details can be viewed in the Prefect Server or Prefect Cloud UI. In this example, Prefect will use the HEAD version of the main branch on each flow run.

hello flow storage details

Next Steps - Run Config

With Prefect Git Storage the runtime configuration and environment management is decoupled from the data pipeline development workflow. Unlike with Docker Storage, with Git Storage, the runtime execution environment and data pipeline development workflows are defined and managed separately. As an added benefit, the developer feedback loop cycle time is also reduced.

With the data engineering workflow addressed, the next step in scaling out the Prefect solution turns to configuration and lifecycle management of the runtime environment for data pipelines. Prefect Run Configs and Job templates provide the tools retaining the flexibility on container image based runtime environments with improved manageability.

· 3 min read
Jeffrey Aven

CloudFormation templates in large environments can grow beyond a manageable point. This article provides one approach to breaking up CloudFormation templates into modules which can be imported and used to create a larger template to deploy a complex AWS stack – using Jsonnet.

Jsonnet is a json pre-processing and templating library which includes features including user defined and built-in functions, objects, and inheritance amongst others. If you are not familiar with Jsonnet, here are some good resources to start with:

Advantages

Using Jsonnet you can use imports to break up large stacks into smaller files scoped for each resource. This approach makes CloudFormation template easier to read and write and allows you to apply the DRY (Do Not Repeat Yourself) coding principle (not possible with native CloudFormation templates.

Additionally, although as the template fragments are in Jsonnet format, you can add annotations or comments to your code similar to YAML (not possible with a JSON template alone), although the rendered template is in legal CloudFormation Json format.

Process Overview

The process is summarised here:

CloudFormation and Jsonnet

Code

This example will deploy a stack with a VPC and an S3 bucket with logging. The project directory structure would look like this:

templates/
├─ includes/
│ ├─ vpc.libsonnet
│ ├─ s3landingbucket.libsonnet
│ ├─ s3loggingbucket.libsonnet
│ ├─ tags.libsonnet
├─ template.jsonnet

Lets look at all of the constituent files:

template.jsonnet

This is the root document which will be processed by Jsonnet to render a legal CloudFormation JSON template. It will import the other files in the includes directory.

includes/tags.libsonnet

This code module is used to generate re-usable tags for other resources (DRY).

includes/vpc.libsonnet

This code module defines a VPC resource to be created with CloudFormation.

includes/s3loggingbucket.libsonnet

This code module defines an S3 bucket resource to be created in the stack which will be used for logging for other buckets.

includes/s3landingbucket.libsonnet

This code module defines an S3 landing bucket resource to be created in the stack.

Testing

To test the pre-processing, you will need a Jsonnet binary/executable for your environment. You can find Docker images which include this for you, or you could build it yourself.

Once you have a compiled binary, you can run the following to generate a rendered CloudFormation template.

jsonnet template.jsonnet -o template.json

You can validate this template using the AWS CLI as shown here:

aws cloudformation validate-template --template-body file://template.json

Deployment

In a previous article, Simplified AWS Deployments with CloudFormation and GitLab CI, I demonstrated an end-to-end deployment pipeline using GitLab CI. Jsonnet pre-processing can be added to this pipeline as an initial ‘preprocess’ stage and job. A snippet from the .gitlab-ci.yml file is included here:

Enjoy!

if you have enjoyed this post, please consider buying me a coffee ☕ to help me keep writing!

· 3 min read
Jeffrey Aven

Managing cloud deployments and IaC pipelines can be challenging. I’ve put together a simple pattern for deploying stacks in AWS using CloudFormation templates using GitLab CI.

This deployment framework enables you to target different environments based upon refs (branches or tags) for instance deploy to a dev environment for a push or merge into develop and deploy to prod on a push or merge into main, otherwise just lint/validate (e.g., for a push to a non-protected feature branch). Templates are uploaded to a designated S3 bucket and staged for use in the pipeline and can be retained as an additional audit trail (in addition to the GitLab project history).

Furthermore, you can review changes (by inspecting change set contents) before deploying, saving you from fat finger deployments 😊.

How it works

The logic is described here:

GitLab CI

The pipleline looks like this in GitLab:

GitLab CI

Prerequisites

You will need to set up GitLab CI variables for AWS_ACCESS_KEY_ID, AWS_SECRET_ACCESS_KEY and optionally AWS_DEFAULT_REGION. You can do this via Settings -> CI/CD -> Variables in your GitLab project. As AWS_ACCESS_KEY_ID and AWS_SECRET_ACCESS_KEY are secrets, they should be configured as protected (as they are only required for protected branches) and masked so they are not printed in job logs.

.gitlab-ci.yml code

The GitLab CI code is shown here:

Reviewing change sets (plans) and applying

Once a pipeline is triggered for an existing stack it will run hands off until a change set (plan) is created. You can inspect the plan by clicking on the Plan GitLab CI job where you would see output like this:

Change Set

If you are OK with the changes proposed, you can simply hit the play button on the last stage of the pipeline (Deploy). Voilà, stack deployed, enjoy!

if you have enjoyed this post, please consider buying me a coffee ☕ to help me keep writing!

· 2 min read
Jeffrey Aven

Big fan of GitLab (and GitLab CI in particular). I had a recent requirement to push changes to a wiki repo associated with a GitLab project through a GitLab CI pipeline (using the SaaS version of GitLab) and ran into a conundrum…

Using the GitLab SaaS version - deploy tokens can’t have write api access, so the next best solution is to use deploy keys, adding your public key as a deploy key and granting this key write access to repositories is relatively straightforward.

This issue is when you attempt to create a masked GitLab CI variable using the private key from your keypair, you get this…

I was a bit astonished to see this to be honest… Looks like it has been raised as an issue several times over the last few years but never resolved (the root cause of which is something to do with newline characters or base64 encoding or the overall length of the string).

I came up with a solution! Not pretty but effective, masks the variable so that it cannot be printed in CI logs as shown here:

Setup

Add a masked and protected GitLab variable for each line in the private key, for example:

The Code

Add the following block to your .gitlab-ci.yml file:

now within Jobs in your pipeline you can simply do this to clone, push or pull from a remote GitLab repo:

as mentioned not pretty, but effective and no other cleaner options as I could see…

if you have enjoyed this post, please consider buying me a coffee ☕ to help me keep writing!