· 5 min read
Chris Ottinger

Molecule Ansible Azure

A few years back, before the rise of the hyper-scalers, I had my first infracode 'aha moment' with OpenStack. The second came with Kitchen.

I had already been using test driven development for application code and configuration automation for infrastructure but Kitchen brought the two together. Kitchen made it possible to write tests, spin up infrastructure, and then tear everything down again - the Red/Green/Refactor cycle for infrastructure. What made this even better was that it wasn't a facsimile of a target environment, it was the same - same VM's, same OS, same network.

Coming from a Chef background for configuration automation, Kitchen is a great fit to the Ruby ecosystem. Kitchen works with Ansible and Azure, but a Ruby environment and at least a smattering of Ruby coding skills are required.

Molecule provides a similar red-green development cycle to Kitchen, but without the need to step outside of the familiar Python environment.

Out of the box, Molecule supports development of Ansible roles using either a Docker or Virtual Box infrastructure provider. Molecule also leverages the Ansible drivers for private and public cloud platforms.

Molecule can be configured to test an individual role or collections of roles in Ansible playbooks.

This tutorial demonstrates how to use Molecule with Azure to develop and test an individual Ansible role following the red/green/refactor infracode workflow, which can be generalised as:

  • Red- write a failing infrastructure test
  • Green - write the Ansible tasks needed to pass the test
  • Refactor - repeat the process

The steps required for this tutorial are as follows:

Azure setup

Ensure there is an existing Azure Resource Group that will be used for infracode development and testing. Within the resource group, ensure there is a single virtual network (vnet) with a single subnet. Ansible will use these for the default network setup.

Setup a working environment

There are a number of options for setting up a Python environment for Ansible and Molecule, including Python virtualenv or a Docker container environment.

Create a Docker image for Ansible+Molecule+Azure

This tutorial uses a Docker container environment. A Dockerfile for the image can be found in ./molecule-azure-image/Dockerfile. The image sets up a sane Python3 environment with Ansible, Ansible[azure], and Molecule pip modules installed.

Create a Docker workspace

Setup a working environment using the Docker image with Ansible, Molecule, and the azure-cli installed.

This example assumes the following:

  • a resource group already exists with access rights to create virtual machines; and
  • the resource group contains a single vnet with a single subnet

Log into an Azure subcription

Ansible supports a number of different methods for authenticating with Azure. This example uses the azure-cli to login interactively.

Create an empty Ansible role with Molecule

Molecule provides an init function with defaults for various providers. The molecule-azure-role-template creates an empty role with scaffolding for Azure.

Check that the environment is working by running the following code:

The output should look be similar to…

Spin up an Azure VM

Spin up a fresh VM to be used for infra-code development.

Molecule provides a handy option for logging into the new VM:

There is now a fresh Ubuntu 18.04 virtual machine ready for infra-code development. For this example, a basic Nginx server will be installed and verified.

Write a failing test

Testinfra provides a pytest based framework for verifying server and infrastructure configuration. Molecule then manages the execution of those testinfra tests. The Molecule template provides a starting point for crafting tests of your own. For this tutorial, installation of the nginx service is verified. Modify the tests file using vi molecule/default/tests/test_default.py

Execute the failing test

The Ansible task needed to install and enable nginx has not yet been written, so the test should fail:

If the initial sample tests in test_default.py are kept, then 3 tests should fail and 2 tests should pass.

Write a task to install nginx

Add a task to install the nginx service using vi tasks/main.yml:

Apply the role

Apply the role to the instance created using Molecule.

The nginx package should now be installed, both enabled and started, and listening on port 80. Note that the nginx instance will not be accessible from the Internet due to the Azure network security rules. The nginx instance can be confirmed manually by logging into the instance and using curl to make a request to the nginx service.

Execute the passing test

After applying the Ansible task to the instance, the testinfra tests should now pass.

Cleanup

Now that the Ansible role works as defined in the test specification, the development environment can be cleaned up.

Molecule removes the Azure resources created to develop and test the configuration role. Note that deletion may take a few minutes.

Finally, once you are done, exit the container environment. If the container was started with the --rm switch, the container will also be removed, leaving you with a clean workspace and newly minted Ansible role with automated test cases.
· 3 min read
Jeffrey Aven

S3 object notifications using Lambda and SES with Terraform

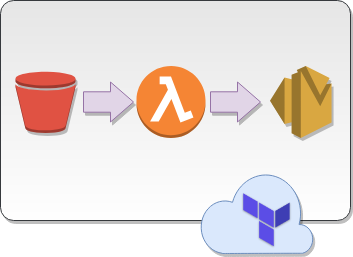
Following on from the previous post in the Really Simple Terraform series simple-lambda-ec2-scheduler, where we used Terraform to deploy a Lambda function including the packaging of the Python function into a ZIP archive and creation of all supporting objects (roles, policies, permissions, etc) – in this post we will take things a step further by using templating to update parameters in the Lambda function code before the packaging and creation of the Lambda function.

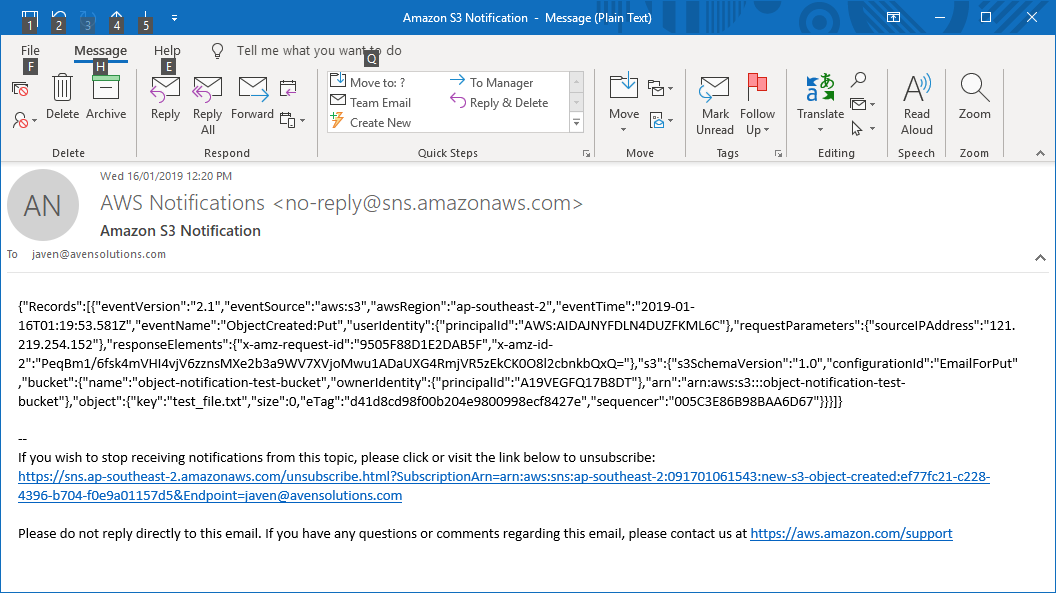
S3 event notifications can be published directly to an SNS topic which you could create an email subscription, this is quite straightforward. However the email notifications you get look something like this:

Email Notification sent via an SNS Topic Subscription

There is very little you can do about this.

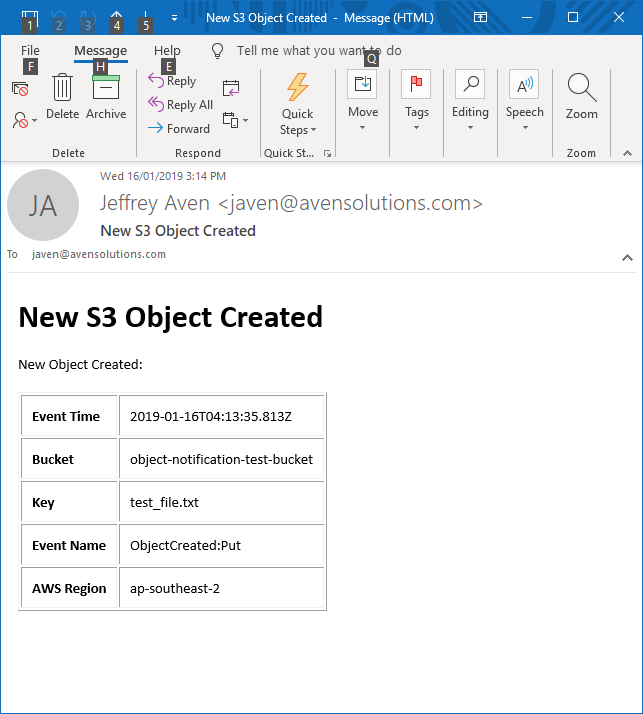
However if you take a slightly different approach by triggering a Lambda function to send an email via SES you have much more control over content and formatting. Using this approach you could get an email notification that looks like this:

Email Notification sent using Lambda and SES

Much easier on the eye!

Prerequisites

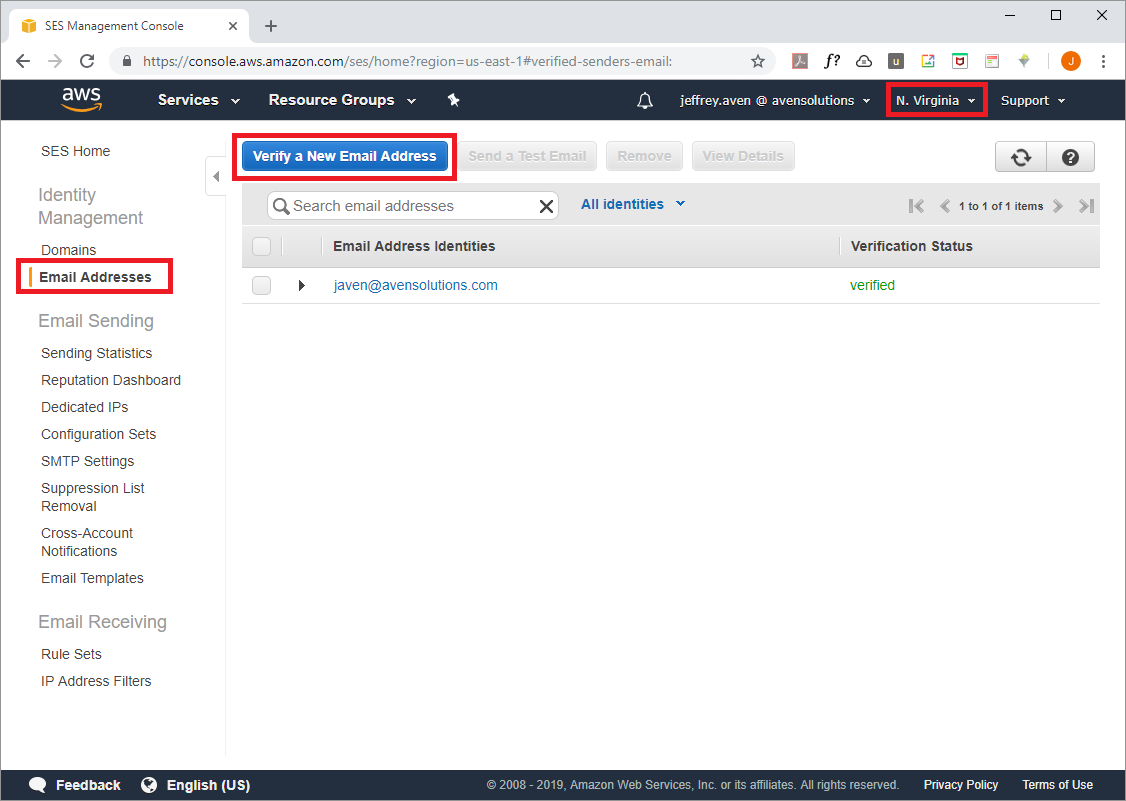
You will need verified AWS SES (Simple Email Service) email addresses for the sender and recipient’s addresses used for your object notification emails. This can be done via the console as shown here:

SES Email Address Verification

Note that SES is not available in every AWS region, pick one that is generally closest to your particular reason (but it really doesn't matter for this purpose).

Deployment

The Terraform module creates an IAM Role and associated policy for the Lambda function as shown here:

Variables in the module are substituted into the function code template, the rendered template file is then packaged as a ZIP archive to be uploaded as the Lambda function source as shown here:

As in the previous post, I will reiterate that although Terraform is technically not a build tool, it can be used for simple build operations such as this.

The Lambda function is deployed using the following code:

Finally the S3 object notification events are configured as shown here:

Use the following commands to run this example (I have created a default credentials profile, but you could supply your API credentials directly, use STS, etc):

cd simple-notifications-with-lambda-and-ses
terraform init
terraform apply

Full source code can be found at: https://github.com/avensolutions/simple-notifications-with-lambda-and-ses

if you have enjoyed this post, please consider buying me a coffee ☕ to help me keep writing!

· 3 min read
Jeffrey Aven

Automate infrastructure tasks using Lambda with Terraform

There are many other blog posts and examples available for either scheduling infrastructure tasks such as the starting or stopping of EC2 instances; or deploying a Lambda function using Terraform. However, I have found many of the other examples to be unnecessarily complicated, so I have put together a very simple example doing both.

The function itself could be easily adapted to take other actions including interacting with other AWS services using the boto3 library (the Python AWS SDK). The data payload could be modified to pass different data to the function as well.

The script only requires input variables for schedule_expression (cron schedule based upon GMT for triggering the function – could also be expressed as a rate, e.g. rate(5 minutes)) and environment (value passed to the function on each invocation). In this example the Input data is the value for the “Environment” key for an EC2 instance tag – a user defined tag to associate the instance to a particular environment (e.g. Dev, Test. Prod). The key could be changed as required, for instance if you wanted to stop instances based upon their given name or part thereof you could change the tag key to be “Name”.

When triggered, the function will stop all running EC2 instances with the given Environment tag.

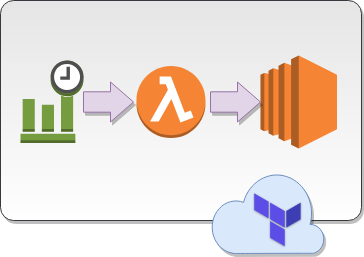
The Terraform script creates:

  • an IAM Role and associated policy for the Lambda Function
  • the Lambda function
  • a Cloudwatch event rule and trigger

The IAM role and policies required for the Lambda function are deployed as shown here:

The function source code is packaged into a ZIP archive and deployed using Terraform as follows:

Admittedly Terraform is an infrastructure automation tool and not a build/packaging tool (such as Jenkins, etc), but in this case the packaging only involves zipping up the function source code, so Terraform can be used as a ‘one stop shop’ to keep things simple.

The Cloudwatch schedule trigger is deployed as follows:

Use the following commands to run this example (I have created a default credentials profile, but you could supply your API credentials directly, use STS, etc):

cd simple-lambda-ec2-scheduler
terraform init
terraform apply

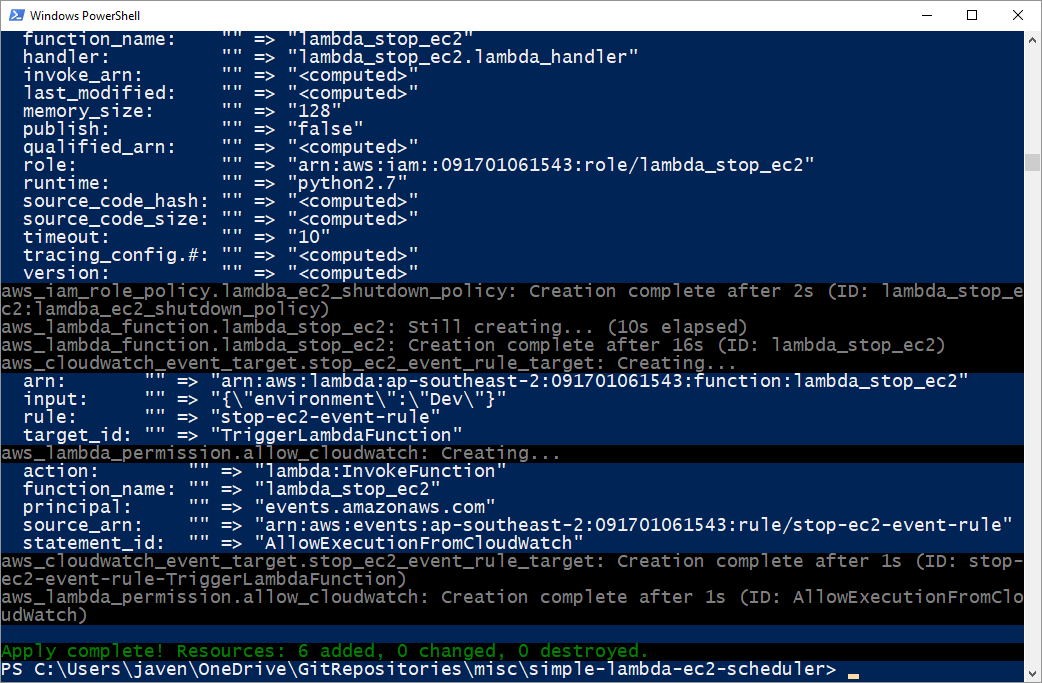
Terraform output

Full source code can be found at: https://github.com/avensolutions/simple-lambda-ec2-scheduler

if you have enjoyed this post, please consider buying me a coffee ☕ to help me keep writing!

· 3 min read
Jeffrey Aven

Spark SQL ETL Framework

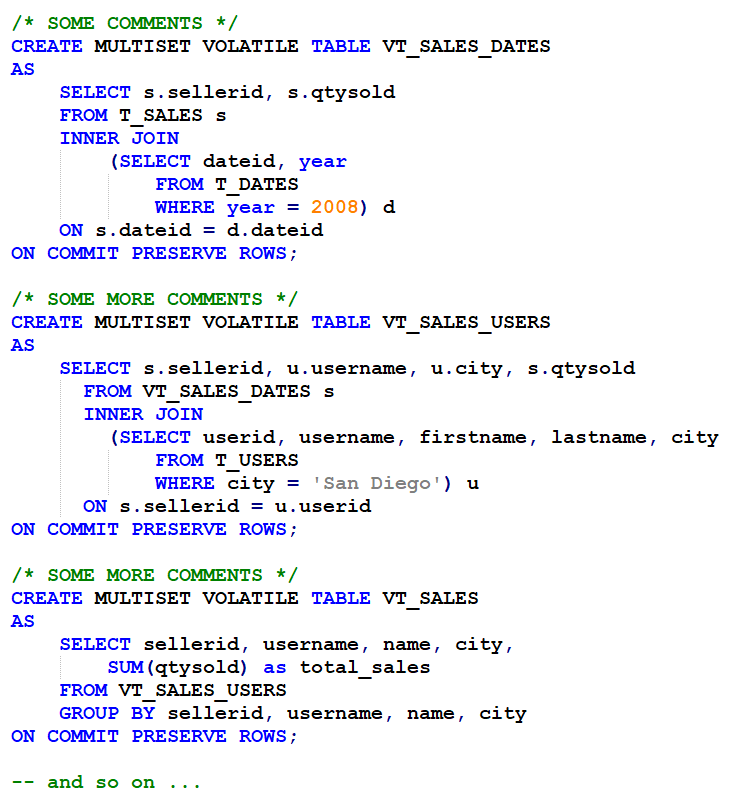
Most traditional data warehouse or datamart ETL routines consist of multi stage SQL transformations, often a series of CTAS (CREATE TABLE AS SELECT) statements usually creating transient or temporary tables – such as volatile tables in Teradata or Common Table Expressions (CTE’s).

The initial challenge when moving from a SQL/MPP based ETL framework platformed on Oracle, Teradata, SQL Server, etc to a Spark based ETL framework is what to do with this…

Multi Stage SQL Based ETL

One approach is to use the lightweight, configuration driven, multi stage Spark SQL based ETL framework described in this post.

This framework is driven from a YAML configuration document. YAML was preferred over JSON as a document format as it allows for multi-line statements (SQL statements), as well as comments - which are very useful as SQL can sometimes be undecipherable even for the person that wrote it.

The YAML config document has three main sections: sources, transforms and targets.

Sources

The sources section is used to configure the input data source(s) including optional column and row filters. In this case the data sources are tables available in the Spark catalog (for instance the AWS Glue Catalog or a Hive Metastore), this could easily be extended to read from other datasources using the Spark DataFrameReader API.

Transforms

The transforms section contains the multiple SQL statements to be run in sequence where each statement creates a temporary view using objects created by preceding statements.

Targets

Finally the targets section writes out the final object or objects to a specified destination (S3, HDFS, etc).

Process SQL Statements

The process_sql_statements.py script that is used to execute the framework is very simple (30 lines of code not including comments, etc). It loads the sources into Spark Dataframes and then creates temporary views to reference these datasets in the transforms section, then sequentially executes the SQL statements in the list of transforms. Lastly the script writes out the final view or views to the desired destination – in this case parquet files stored in S3 were used as the target.

You could implement an object naming convention such as prefixing object names with sv_, iv_, fv_ (for source view, intermediate view and final view respectively) if this helps you differentiate between the different objects.

To use this framework you would simply use spark-submit as follows:

spark-submit process_sql_statements.py config.yml

Full source code can be found at: https://github.com/avensolutions/spark-sql-etl-framework

if you have enjoyed this post, please consider buying me a coffee ☕ to help me keep writing!