
10 posts tagged with "python"

View All Tags

· 9 min read
Jeffrey Aven

CDC using Spark

Change Data Capture (CDC) is one of the most challenging processing patterns to implement at scale. I personally have had several cracks at this using various different frameworks and approaches, the most recent of which was implemented using Spark – and I think I have finally found the best approach. Even though the code examples referenced use Spark, the pattern is language agnostic – the focus is on the approach not the specific implementation (as this could be applied to any framework or runtime).

The first challenge you are faced with, is to compare a very large dataset (representing the current state of an object) with another potentially very large dataset (representing new or incoming data). Ideally, you would like the process to be configuration driven and accommodate such things as composite primary keys, or operational columns which you would like to restrict from change detection. You may also want to implement a pattern to segregate sensitive attributes from non-sensitive attributes.

Overview

This pattern (and all my other recent attempts) is fundamentally based upon calculating a deterministic hash of the key and non-key attribute(s), and then using this hash as the basis for comparison. The difference between this pattern and my other attempts is in the distillation and reconstitution of data during the process, as well as breaking the pattern into discrete stages (designed to minimize the impact to other applications). This pattern can be used to process delta or full datasets.

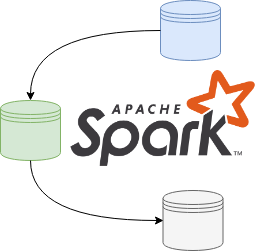
A high-level flowchart representing the basic pattern is shown here:

CDC Flowchart

The Example

The example provided uses the Synthetic CDC Data Generator application, configuring an incoming set with 5 uuid columns acting as a composite key, and 10 random number columns acting as non key values. The initial days payload consists of 10,000 records, the subsequent days payload consists of another 10,000 records. From the initial dataset, a DELETE operation was performed at the source system for 20% of records, an UPDATE was performed on 40% of the records and the remaining 40% of records were unchanged. In this case the 20% of records that were deleted at the source, were replaced by new INSERT operations creating new keys.

After creating the synthesized day 1 and day 2 datasets, the files are processed as follows:

$ spark-submit cdc.py config.yaml data/day1 2019-06-18
$ spark-submit cdc.py config.yaml data/day2 2019-06-19

Where config.yaml is the configuration for the dataset, data/day1 and data/day2 represent the different data files, and 2019-06-18 and 2019-06-19 represent a business effective date.

The Results

You should see the following output from running the preceding commands for day 1 and day 2 respectively:

Day 1:

Day 2:

A summary analysis of the resultant dataset should show:

Pattern Details

Details about the pattern and its implementation follow.

Current and Historical Datasets

The output of each operation will yield a current dataset (that is the current stateful representation of a give object) and a historical dataset partition (capturing the net changes from the previous state in an appended partition).

This is useful, because often consumers will primarily query the latest state of an object. The change sets (or historical dataset partitions) can be used for more advanced analysis by sophisticated users.

Type 2 SCDs (sort of)

Two operational columns are added to each current and historical object:

  • OPERATION : Represents the last known operation to the record, valid values include :
    • I (INSERT)
    • U (UPDATE)
    • D (DELETE – hard DELETEs, applies to full datasets only)
    • X (Not supplied, applies to delta processing only)
    • N (No change)
  • EFF_START_DATE

Since data structures on most big data or cloud storage platforms are immutable, we only store the effective start date for each record, this is changed as needed with each coarse-grained operation on the current object. The effective end date is inferred by the presence of a new effective start date (or change in the EFF_START_DATE value for a given record).

The Configuration

I am using a YAML document to store the configuration for the pattern. Important attributes to include in your configuration are a list of keys and non keys and their datatype (this implementation does type casting as well). Other important attributes include the table names and file paths for the current and historical data structures.

The configuration is read at the beginning of a routine as an input along with the path of an incoming data file (a CSV file in this case) and a business effective date (which will be used as the EFF_START_DATE for new or updated records).

Processing is performed using the specified key and non key attributes and the output datasets (current and historical) are written to columnar storage files (parquet in this case). This is designed to make subsequent access and processing more efficient.

The Algorithm

I have broken the process into stages as follows:

Stage 1 – Type Cast and Hash Incoming Data

The first step is to create deterministic hashes of the configured key and non key values for incoming data. The hashes are calculated based upon a list of elements representing the key and non key values using the MD5 algorithm. The hashes for each record are then stored with the respective record. Furthermore, the fields are casted their target datatype as specified in the configuration. Both of these operations can be performed in a single pass of each row using a map() operation.

Importantly we only calculate hashes once upon arrival of new data, as the hashes are persisted for the life of the data – and the data structures are immutable – the hashes should never change or be invalidated.

Stage 2 – Determine INSERTs

We now compare Incoming Hashes with previously calculated hash values for the (previous day’s) current object. If no current object exists for the dataset, then it can be assumed this is a first run. In this case every record is considered as an INSERT with an EFF_START_DATE of the business effective date supplied.

If there is a current object, then the key and non key hash values (only the hash values) are read from the current object. These are then compared to the respective hashes of the incoming data (which should still be in memory).

Given the full outer join:

incoming_data(keyhash, nonkeyhash) FULL OUTER JOIN
current_data(keyhash, nonkeyhash) ON keyhash

Keys which exist in the left entity which do not exist in the right entity must be the results of an INSERT operation.

Tag these records with an operation of I with an EFF_START_DATE of the business effective date, then rejoin only these records with their full attribute payload from the incoming dataset. Finally, write out these records to the current and historical partition in overwrite mode.

Stage 3 - Determine DELETEs or Missing Records

Referring the previous full outer join operation, keys which exist in the right entity (current object) which do not appear in the left entity (incoming data) will be the result of a (hard) DELETE operation if you are processing full snapshots, otherwise if you are processing deltas these would be missing records (possibly because there were no changes at the source).

Tag these records as D or X respectively with an EFF_START_DATE of the business effective date, rejoin these records with their full attribute payload from the current dataset, then write out these records to the current and historical partition in append mode.

Stage 4 - Determine UPDATEs or Unchanged Records

Again, referring to the previous full outer join, keys which exist in both the incoming and current datasets must be either the result of an UPDATE or they could be unchanged. To determine which case they fall under, compare the non key hashes. If the non key hashes differ, it must have been a result of an UPDATE operation at the source, otherwise the record would be unchanged.

Tag these records as U or N respectively with an EFF_START_DATE of the business effective date (in the case of an update - otherwise maintain the current EFF_START_DATE), rejoin these records with their full attribute payload from the incoming dataset, then write out these records to the current and historical partition in append mode.

Key Callouts

A summary of the key callouts from this pattern are:

  • Use the RDD API for iterative record operations (such as type casting and hashing)
  • Persist hashes with the records
  • Use Dataframes for JOIN operations
  • Only perform JOINs with the keyhash and nonkeyhash columns – this minimizes the amount of data shuffled across the network
  • Write output data in columnar (Parquet) format
  • Break the routine into stages, covering each operation, culminating with a saveAsParquet() action – this may seem expensive but for large datsets it is more efficient to break down DAGs for each operation
  • Use caching for objects which will be reused between actions

Metastore Integration

Although I did not include this in my example, you could easily integrate this pattern with a metastore (such as a Hive metastore or AWS Glue Catalog), by using table objects and ALTER TABLE statements to add historical partitions.

Further optimisations

If the incoming data is known to be relatively small (in the case of delta processing for instance), you could consider a broadcast join where the smaller incoming data is distributed to all of the different Executors hosting partitions from the current dataset.

Also you could add a key to the column config to configure a column to be nullable or not.

Happy CDCing!

Full source code for this article can be found at: https://github.com/avensolutions/cdc-at-scale-using-spark

if you have enjoyed this post, please consider buying me a coffee ☕ to help me keep writing!

· 2 min read
Jeffrey Aven

This is a simple routine to generate random data with a configurable number or records, key fields and non key fields to be used to create synthetic data for source change data capture (CDC) processing. The output includes an initial directory containing CSV files representing an initial data load, and an incremental directory containing CSV files representing incremental data.

Spark Training Courses from the AlphaZetta Academy

Data Transformation and Analysis Using Apache Spark
Stream and Event Processing using Apache Spark
Advanced Analytics Using Apache Spark

Arguments (by position) include:

  • no_init_recs : the number of initial records to generate
  • no_incr_recs : the number of incremental records on the second run - should be >= no_init_recs
  • no_keys : number of key columns in the dataset – keys are generated as UUIDs
  • no_nonkeys : number of non-key columns in the dataset – nonkey values are generated as random numbers
  • pct_del : percentage of initial records deleted on the second run - between 0.0 and 1.0
  • pct_upd : percentage of initial records updated on the second run - between 0.0 and 1.0
  • pct_unchanged : percentage of records unchanged on the second run - between 0.0 and 1.0
  • initial_output : folder for initial output in CSV format
  • incremental_output : folder for incremental output in CSV format

NOTE : pct_del + pct_upd + pct_unchanged must equal 1.0

Example usage:

$ spark-submit synthetic-cdc-data-generator.py 100000 100000 2 3 0.2 0.4 0.4 data/day1 data/day2

Example output from the day1 run for the above configuration would look like this:

Note that this routine can be run subsequent times producing different key and non key values each time, as the keys are UUIDs and the values are random numbers.

We will use this application to generate random input data to demonstrate CDC using Spark in a subsequent post, see you soon!

Full source code can be found at: https://github.com/avensolutions/synthetic-cdc-data-generator

if you have enjoyed this post, please consider buying me a coffee ☕ to help me keep writing!

· 5 min read
Chris Ottinger

Molecule Ansible Azure

A few years back, before the rise of the hyper-scalers, I had my first infracode 'aha moment' with OpenStack. The second came with Kitchen.

I had already been using test driven development for application code and configuration automation for infrastructure but Kitchen brought the two together. Kitchen made it possible to write tests, spin up infrastructure, and then tear everything down again - the Red/Green/Refactor cycle for infrastructure. What made this even better was that it wasn't a facsimile of a target environment, it was the same - same VM's, same OS, same network.

Coming from a Chef background for configuration automation, Kitchen is a great fit to the Ruby ecosystem. Kitchen works with Ansible and Azure, but a Ruby environment and at least a smattering of Ruby coding skills are required.

Molecule provides a similar red-green development cycle to Kitchen, but without the need to step outside of the familiar Python environment.

Out of the box, Molecule supports development of Ansible roles using either a Docker or Virtual Box infrastructure provider. Molecule also leverages the Ansible drivers for private and public cloud platforms.

Molecule can be configured to test an individual role or collections of roles in Ansible playbooks.

This tutorial demonstrates how to use Molecule with Azure to develop and test an individual Ansible role following the red/green/refactor infracode workflow, which can be generalised as:

  • Red- write a failing infrastructure test
  • Green - write the Ansible tasks needed to pass the test
  • Refactor - repeat the process

The steps required for this tutorial are as follows:

Azure setup

Ensure there is an existing Azure Resource Group that will be used for infracode development and testing. Within the resource group, ensure there is a single virtual network (vnet) with a single subnet. Ansible will use these for the default network setup.

Setup a working environment

There are a number of options for setting up a Python environment for Ansible and Molecule, including Python virtualenv or a Docker container environment.

Create a Docker image for Ansible+Molecule+Azure

This tutorial uses a Docker container environment. A Dockerfile for the image can be found in ./molecule-azure-image/Dockerfile. The image sets up a sane Python3 environment with Ansible, Ansible[azure], and Molecule pip modules installed.

Create a Docker workspace

Setup a working environment using the Docker image with Ansible, Molecule, and the azure-cli installed.

This example assumes the following:

  • a resource group already exists with access rights to create virtual machines; and
  • the resource group contains a single vnet with a single subnet

Log into an Azure subcription

Ansible supports a number of different methods for authenticating with Azure. This example uses the azure-cli to login interactively.

Create an empty Ansible role with Molecule

Molecule provides an init function with defaults for various providers. The molecule-azure-role-template creates an empty role with scaffolding for Azure.

Check that the environment is working by running the following code:

The output should look be similar to…

Spin up an Azure VM

Spin up a fresh VM to be used for infra-code development.

Molecule provides a handy option for logging into the new VM:

There is now a fresh Ubuntu 18.04 virtual machine ready for infra-code development. For this example, a basic Nginx server will be installed and verified.

Write a failing test

Testinfra provides a pytest based framework for verifying server and infrastructure configuration. Molecule then manages the execution of those testinfra tests. The Molecule template provides a starting point for crafting tests of your own. For this tutorial, installation of the nginx service is verified. Modify the tests file using vi molecule/default/tests/test_default.py

Execute the failing test

The Ansible task needed to install and enable nginx has not yet been written, so the test should fail:

If the initial sample tests in test_default.py are kept, then 3 tests should fail and 2 tests should pass.

Write a task to install nginx

Add a task to install the nginx service using vi tasks/main.yml:

Apply the role

Apply the role to the instance created using Molecule.

The nginx package should now be installed, both enabled and started, and listening on port 80. Note that the nginx instance will not be accessible from the Internet due to the Azure network security rules. The nginx instance can be confirmed manually by logging into the instance and using curl to make a request to the nginx service.

Execute the passing test

After applying the Ansible task to the instance, the testinfra tests should now pass.

Cleanup

Now that the Ansible role works as defined in the test specification, the development environment can be cleaned up.

Molecule removes the Azure resources created to develop and test the configuration role. Note that deletion may take a few minutes.

Finally, once you are done, exit the container environment. If the container was started with the --rm switch, the container will also be removed, leaving you with a clean workspace and newly minted Ansible role with automated test cases.

· 3 min read
Jeffrey Aven

S3 object notifications using Lambda and SES with Terraform

Following on from the previous post in the Really Simple Terraform series simple-lambda-ec2-scheduler, where we used Terraform to deploy a Lambda function including the packaging of the Python function into a ZIP archive and creation of all supporting objects (roles, policies, permissions, etc) – in this post we will take things a step further by using templating to update parameters in the Lambda function code before the packaging and creation of the Lambda function.

S3 event notifications can be published directly to an SNS topic which you could create an email subscription, this is quite straightforward. However the email notifications you get look something like this:

Email Notification sent via an SNS Topic Subscription

There is very little you can do about this.

However if you take a slightly different approach by triggering a Lambda function to send an email via SES you have much more control over content and formatting. Using this approach you could get an email notification that looks like this:

Email Notification sent using Lambda and SES

Much easier on the eye!

Prerequisites

You will need verified AWS SES (Simple Email Service) email addresses for the sender and recipient’s addresses used for your object notification emails. This can be done via the console as shown here:

SES Email Address Verification

Note that SES is not available in every AWS region, pick one that is generally closest to your particular reason (but it really doesn't matter for this purpose).

Deployment

The Terraform module creates an IAM Role and associated policy for the Lambda function as shown here:

Variables in the module are substituted into the function code template, the rendered template file is then packaged as a ZIP archive to be uploaded as the Lambda function source as shown here:

As in the previous post, I will reiterate that although Terraform is technically not a build tool, it can be used for simple build operations such as this.

The Lambda function is deployed using the following code:

Finally the S3 object notification events are configured as shown here:

Use the following commands to run this example (I have created a default credentials profile, but you could supply your API credentials directly, use STS, etc):

cd simple-notifications-with-lambda-and-ses
terraform init
terraform apply

Full source code can be found at: https://github.com/avensolutions/simple-notifications-with-lambda-and-ses

if you have enjoyed this post, please consider buying me a coffee ☕ to help me keep writing!

· 3 min read
Jeffrey Aven

Automate infrastructure tasks using Lambda with Terraform

There are many other blog posts and examples available for either scheduling infrastructure tasks such as the starting or stopping of EC2 instances; or deploying a Lambda function using Terraform. However, I have found many of the other examples to be unnecessarily complicated, so I have put together a very simple example doing both.

The function itself could be easily adapted to take other actions including interacting with other AWS services using the boto3 library (the Python AWS SDK). The data payload could be modified to pass different data to the function as well.

The script only requires input variables for schedule_expression (cron schedule based upon GMT for triggering the function – could also be expressed as a rate, e.g. rate(5 minutes)) and environment (value passed to the function on each invocation). In this example the Input data is the value for the “Environment” key for an EC2 instance tag – a user defined tag to associate the instance to a particular environment (e.g. Dev, Test. Prod). The key could be changed as required, for instance if you wanted to stop instances based upon their given name or part thereof you could change the tag key to be “Name”.

When triggered, the function will stop all running EC2 instances with the given Environment tag.

The Terraform script creates:

  • an IAM Role and associated policy for the Lambda Function
  • the Lambda function
  • a Cloudwatch event rule and trigger

The IAM role and policies required for the Lambda function are deployed as shown here:

The function source code is packaged into a ZIP archive and deployed using Terraform as follows:

Admittedly Terraform is an infrastructure automation tool and not a build/packaging tool (such as Jenkins, etc), but in this case the packaging only involves zipping up the function source code, so Terraform can be used as a ‘one stop shop’ to keep things simple.

The Cloudwatch schedule trigger is deployed as follows:

Use the following commands to run this example (I have created a default credentials profile, but you could supply your API credentials directly, use STS, etc):

cd simple-lambda-ec2-scheduler
terraform init
terraform apply

Terraform output

Full source code can be found at: https://github.com/avensolutions/simple-lambda-ec2-scheduler

if you have enjoyed this post, please consider buying me a coffee ☕ to help me keep writing!