3 posts tagged with "typescript"

View All Tags

· One min read
Jeffrey Aven

In the stackql project we needed an API to serve configuration file packages (stackql providers) to the stackql application at runtime.

Traditional artifact repositories or package managers were unsuitable as they were mainly designed for container images, JavaScript modules, Python packages etc. The artifacts, in this case, are signed tarball sets of OpenAPI specification documents (text files).

We have recently moved our provider registry (stackql-provider-registry) to use Deno Deploy as the serving layer (the API).

The code

The code is reasonably straightforward as shown here:

The deployment

We are using GitHub Actions to push assets and code to Deno Deploy, this was straightforward as well as you can see here:

if you have enjoyed this post, please consider buying me a coffee ☕ to help me keep writing!

· 3 min read
Jeffrey Aven

Those who have built projects (front end or back end) with JavaScript or TypeScript would have no doubt felt pain or been frustrated with some aspect of package management - package.json, package-lock.json, node_modules, npm, npmjs, yarn etc.

Enter Deno, a "package manager-less" runtime for JavaScript and TypeScript. That's right, no package.json, no node_modules folder, no npm or yarn.

Background

Deno was created by Ryan Dahl, the creator of Node.js, who realised the monster that was created with package management and managers, dependencies, and dependency management, which in many cases is more complex than the frameworks or projects that are being implemented.

Packages

I said deno was "package manager-less"; however it is not "package-less". Deno does not use npmjs; instead, packages (js or ts) can be hosted at any reachable URL. Local imports and exports are supported too.

Deno's standard library packages ("batteries included" modules) are hosted at deno.land/std@LATEST_VERSION, a third-party hosted library is available at deno.land/x.

With deno installed, you can run something like this:

deno run https://deno.land/std@0.154.0/examples/welcome.ts

Imports

Using the Deno runtime, developers specify modules to use in their program using this import syntax:

import { Application, Router } from "https://deno.land/x/oak/mod.ts";

You can specify a version if desired in the URL, such as:

import {
Bson,
MongoClient,
} from "https://deno.land/x/mongo@v0.31.0/mod.ts";

Packages do not have to be downloaded or installed before running your code.

The first time your code is run, all packages are downloaded to a local cache and any Typescript modules are transpiled to JavaScript.

Publishing with Deno Deploy

Deno deploy is a package publishing framework that directly integrates with GitHub (no separate npm publish step). Deno deploy is backed by a CDN and a network of edge servers to make deno packages available. Packages can be published by a push to a branch, reviewed via a deployed preview, and merged to release to production.

Quickstart

To get going, you first need to download and install deno, which will vary based upon your operating system, but there are all the usual suspect installers available (homebrew, chocolatey, etc); see here.

Once you have installed deno on your system, you can create a project folder (no npm init or package.json required), and create the following file (as server.ts), which will run a very simple middleware server using a third-party module, oak.

import { Application, Router } from "https://deno.land/x/oak/mod.ts";

const router = new Router();
router
.get("/ping", (context) => {
context.response.body = "pong";
});

const app = new Application();
app.use(router.routes());
app.use(router.allowedMethods());

await app.listen({ port: 8080 });

now run your server using the following command:

deno run --allow-net server.ts

now:

curl -XGET http://localhost:8080/ping

should return:

pong

easy!

if you have enjoyed this post, please consider buying me a coffee ☕ to help me keep writing!
· 3 min read
Yuncheng Yang

This article demonstrates how to use the Snowflake REST API to retrieve data for a web application using TypeScript, in this case we are using keypair authentication with Snowflake.

Overview

Snowflake’s SQL API allows you to access snowflake objects using SQL via a REST API request, this allows for easy integration with your applications and deployment pipelines. You can use the API to execute most DDL and DML statements.

There are some limitations you need to be aware of however, for example interactions with stages (using PUT and GET aren’t supported via the Snowflake API) or stored procedure operations (using CALL), you can read more on this here.

Endpoints

There are three endpoints provided:

  • /api/v2/statements/
  • /api/v2/statement/<statementHandle>
  • /api/v2/statements/<statementHandle/cancel

We will be looking at the first two in this article.

Authentication Methods

There are two types of Authentication methods for the API, OAuth and Key Pair. For OAuth method, you can choose to use X-Snowflake-Authorization-Token-Type header, if this header is not present, Snowflake assumes that the token in the Authorization header is an OAuth token. For Key Pair method, the JWT token will be in the Authorization header as Bearer <your token>.

Let’s walk through how to generate and use the JWT.

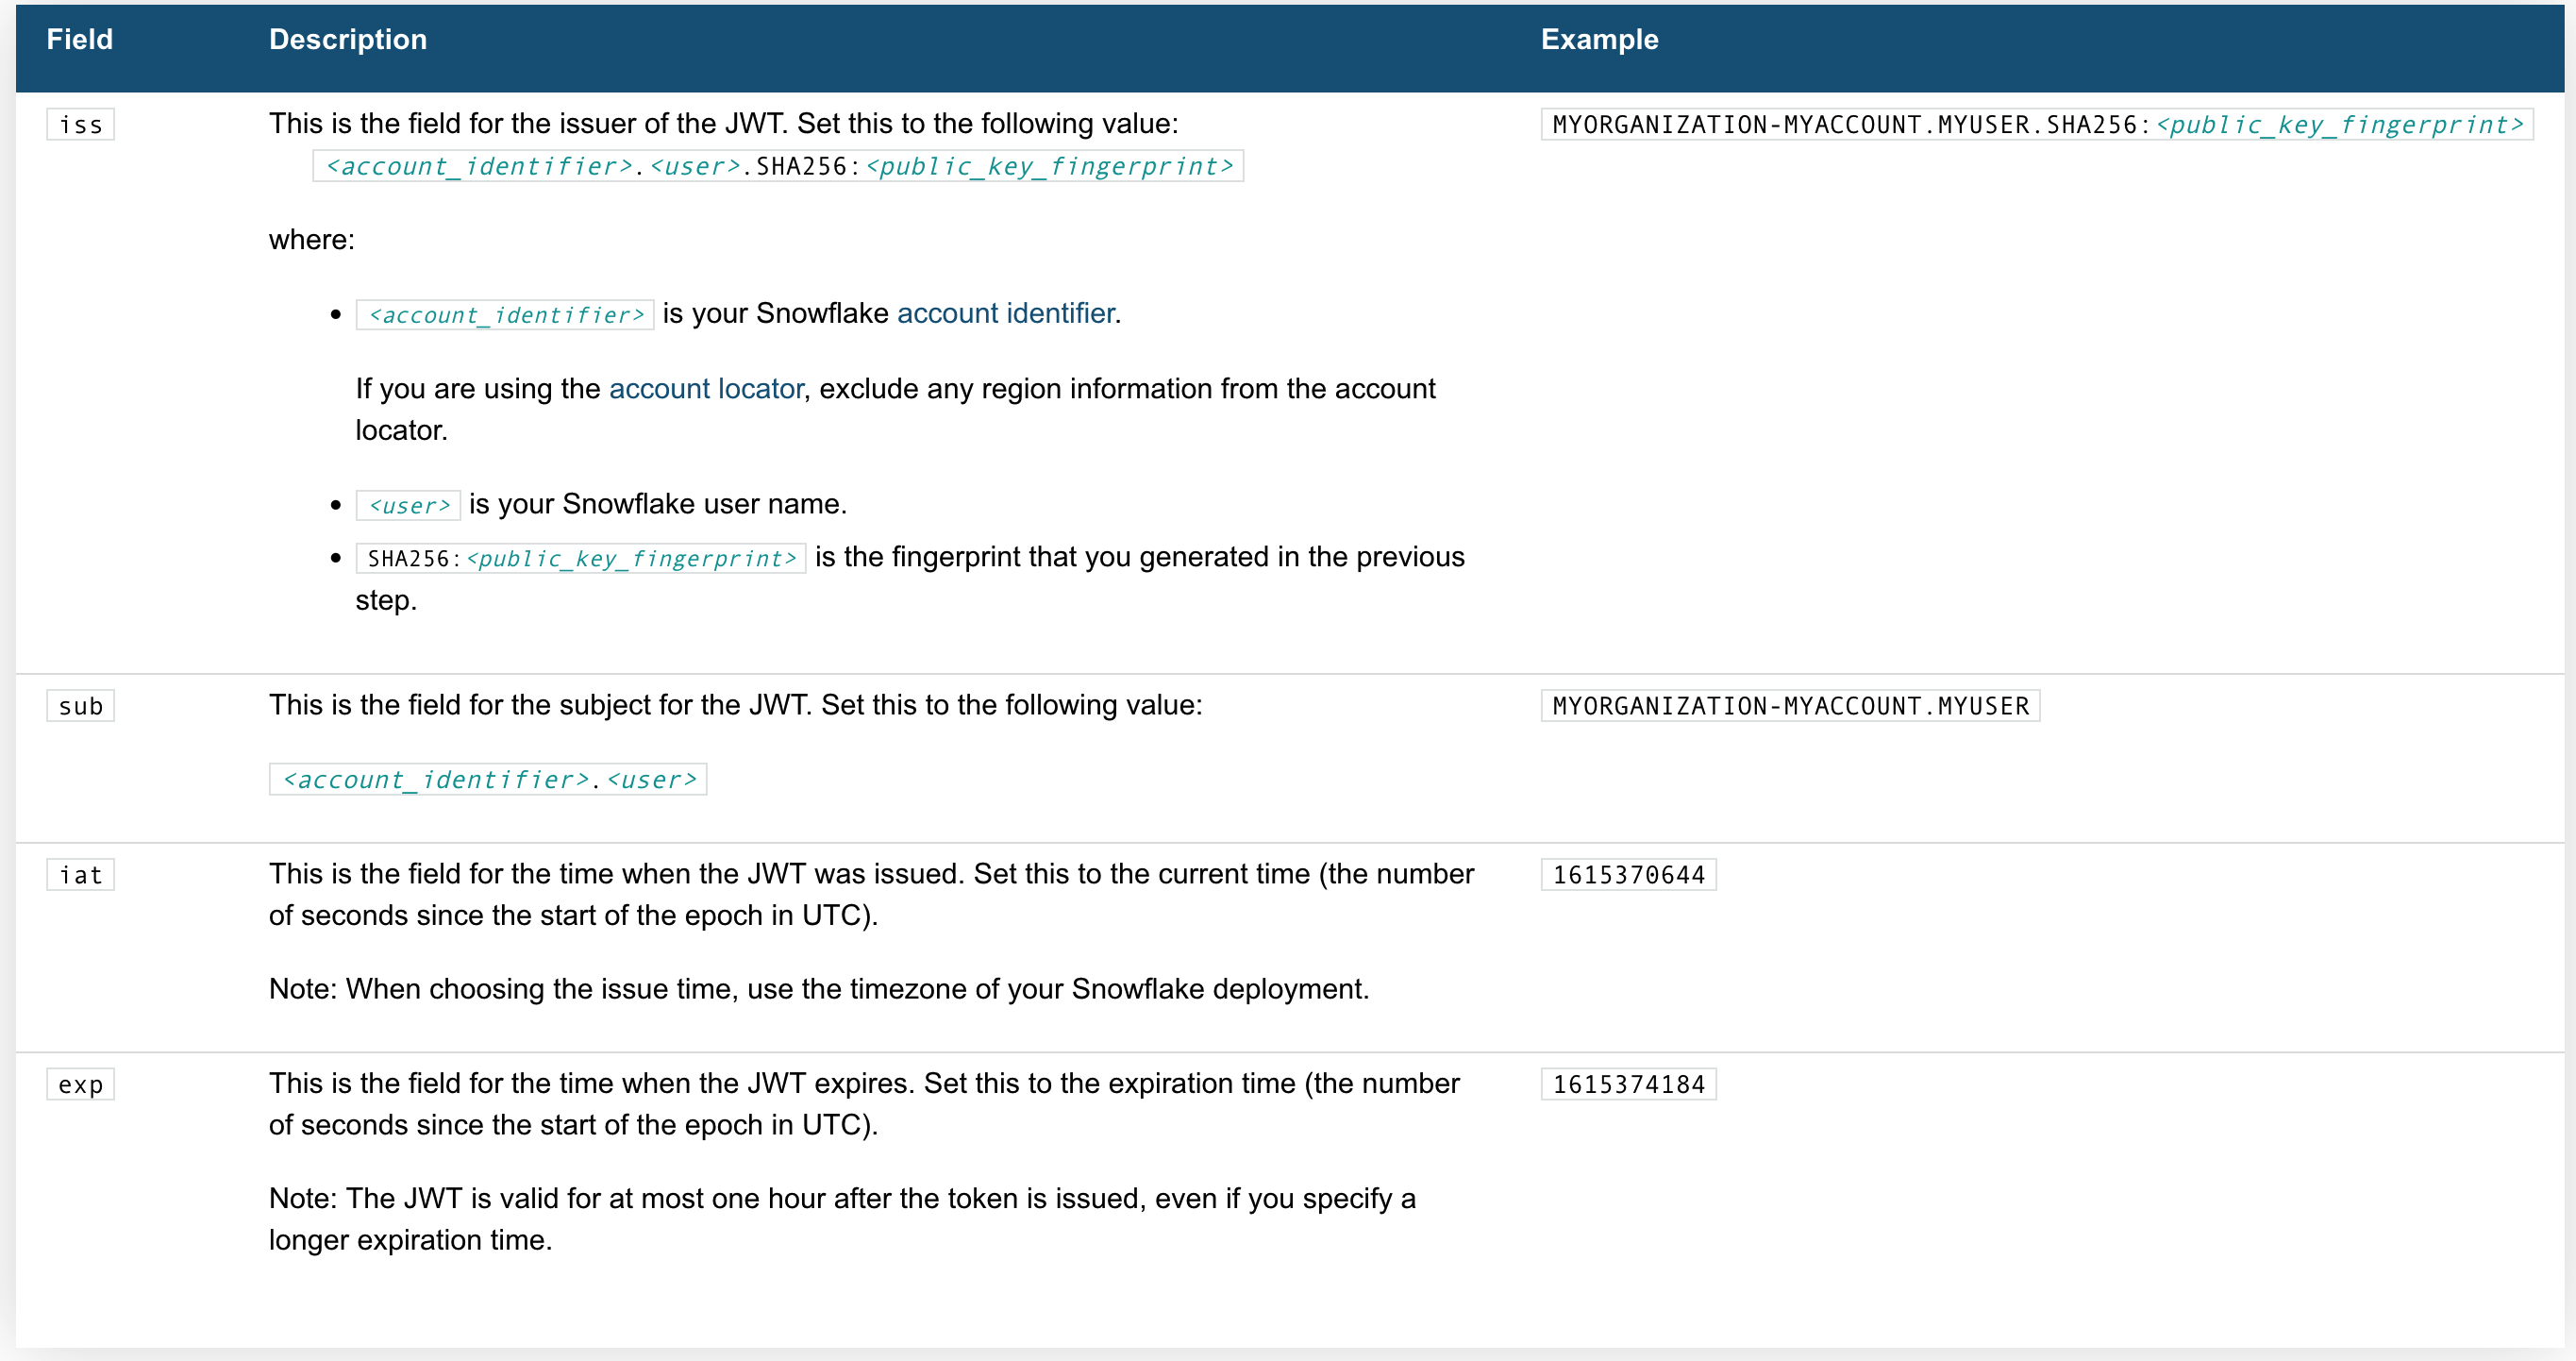
Generating the JWT

Here's whats needed:

Snowflake JWT

the Code

Request Body

Now we need a request body:

Submitting the Request

We will need to include the region and account identifier, for instance if your account identifier includes a region (e.g. xy12345.us-east2.aws.snowflakecomputing.com).

Response Handling

When making a SELECT query, there are three things worth noting:

  1. rowType fields in the resultSetMetaData represent the columns
  2. data without column names is in the format of string[][]
  3. partitionInfo is an array of object representing different partitions

For more information see Handling Responses from the SQL API - Snowflake Documentation.

Parsing data

Here is a Typescript code snippet demonstrating parsing return data:

Handling multiple partitions

Large result sets are paginated into partitions, each partition is a set of rows.

note

Note that the pages (referred to as partitions) are NOT based on row count, instead they are based on the compressed batch size, so they will not be uniform in terms of the number of rows.

To get a partition, send a GET request with Url https://<accountIdentifier>.snowflakecomputing.com/api/v2/statements/?partition=<partitionId>.

Thanks!