
2 posts tagged with "react"

View All Tags

· 3 min read
Yuncheng Yang

This article demonstrates how to use the Snowflake REST API to retrieve data for a web application using TypeScript, in this case we are using keypair authentication with Snowflake.

Overview

Snowflake’s SQL API allows you to access snowflake objects using SQL via a REST API request, this allows for easy integration with your applications and deployment pipelines. You can use the API to execute most DDL and DML statements.

There are some limitations you need to be aware of however, for example interactions with stages (using PUT and GET aren’t supported via the Snowflake API) or stored procedure operations (using CALL), you can read more on this here.

Endpoints

There are three endpoints provided:

  • /api/v2/statements/
  • /api/v2/statement/<statementHandle>
  • /api/v2/statements/<statementHandle/cancel

We will be looking at the first two in this article.

Authentication Methods

There are two types of Authentication methods for the API, OAuth and Key Pair. For OAuth method, you can choose to use X-Snowflake-Authorization-Token-Type header, if this header is not present, Snowflake assumes that the token in the Authorization header is an OAuth token. For Key Pair method, the JWT token will be in the Authorization header as Bearer <your token>.

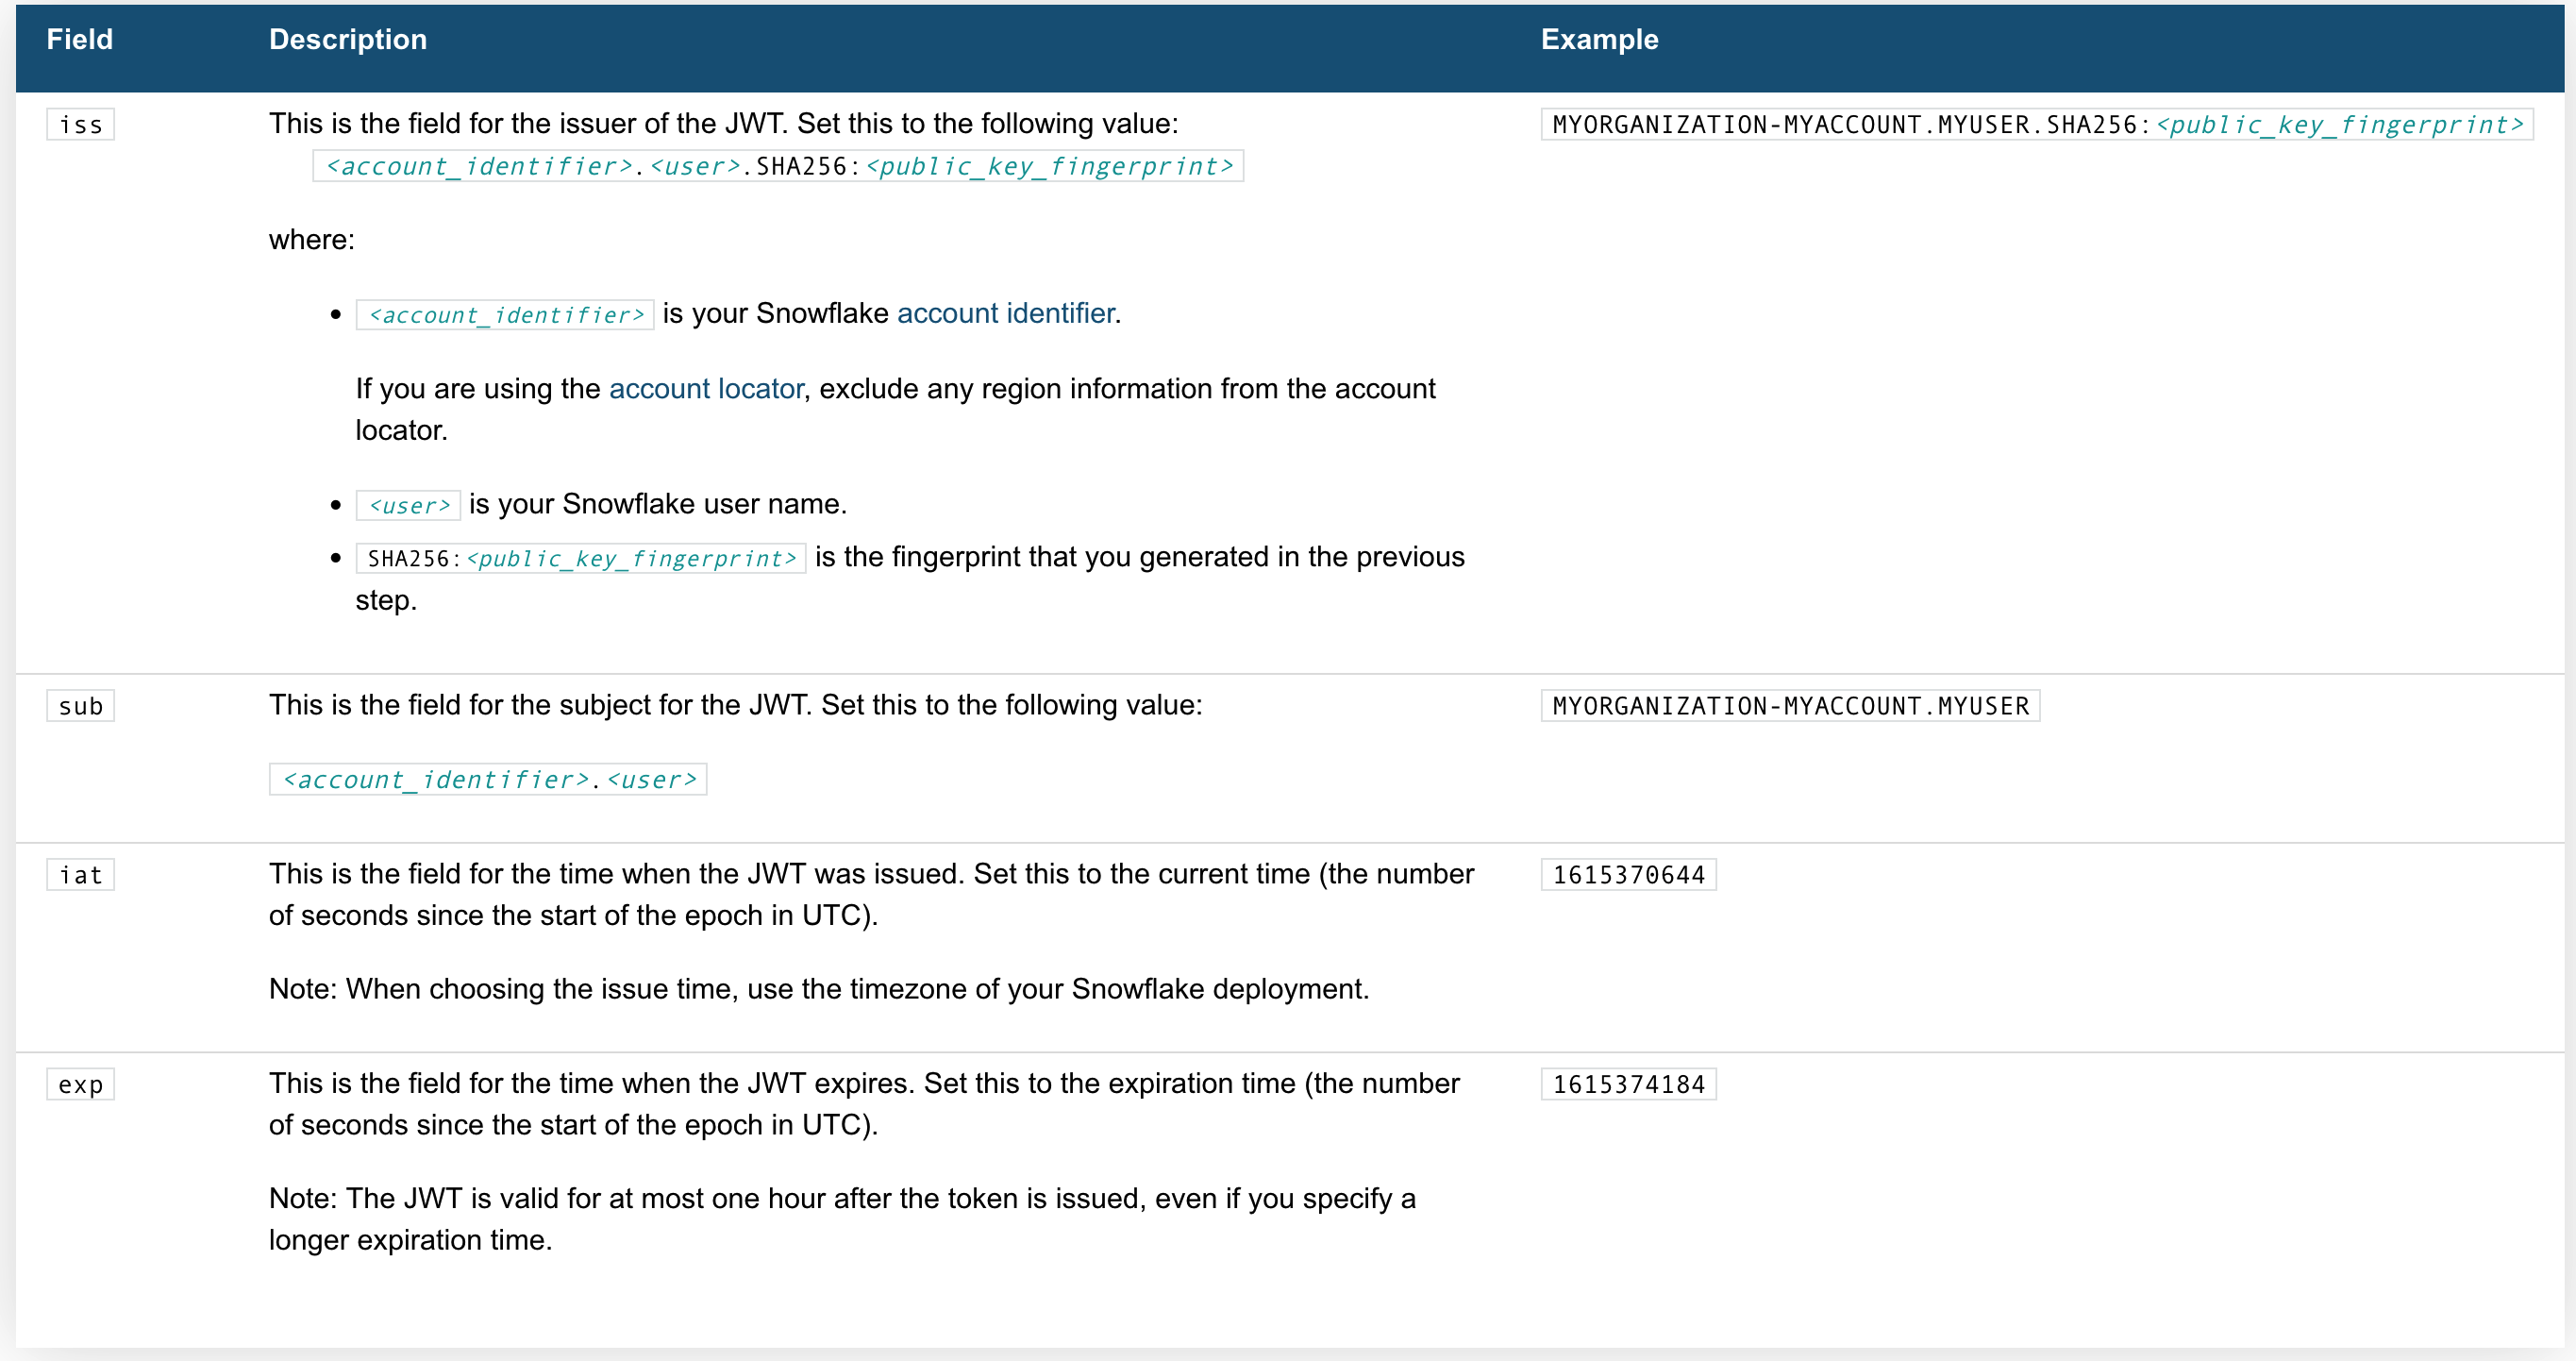
Let’s walk through how to generate and use the JWT.

Generating the JWT

Here's whats needed:

Snowflake JWT

the Code

Request Body

Now we need a request body:

Submitting the Request

We will need to include the region and account identifier, for instance if your account identifier includes a region (e.g. xy12345.us-east2.aws.snowflakecomputing.com).

Response Handling

When making a SELECT query, there are three things worth noting:

  1. rowType fields in the resultSetMetaData represent the columns
  2. data without column names is in the format of string[][]
  3. partitionInfo is an array of object representing different partitions

For more information see Handling Responses from the SQL API - Snowflake Documentation.

Parsing data

Here is a Typescript code snippet demonstrating parsing return data:

Handling multiple partitions

Large result sets are paginated into partitions, each partition is a set of rows.

note

Note that the pages (referred to as partitions) are NOT based on row count, instead they are based on the compressed batch size, so they will not be uniform in terms of the number of rows.

To get a partition, send a GET request with Url https://<accountIdentifier>.snowflakecomputing.com/api/v2/statements/?partition=<partitionId>.

Thanks!

· 3 min read
Jeffrey Aven

Azure Static WebApp

The Azure Static Web App feature is relatively new in the Azure estate which has recently become generally available, I thought I would take it for a test drive and discuss my findings.

I am a proponent of the JAMStack architecture for front end applications and a user of CD enabled CDN services like Netlify, so this Azure feature was naturally appealing to me.

Azure SWAs allow you to serve static assets (like JavaScript) without a origin server, meaning you don’t need a web server, are able to streamline content distribution and web app performance, and reduce the attack surface area of your application.

The major advantage to using is simplicity, no scaffolding or infra requirements and it is seamlessly integrated into your CI/CD processes (natively if you are using GitHub).

Deploying Static Web Apps in Azure

Pretty simple to setup, aside from a name and a resource group, you just need to supply:

  • a location (Azure region to be used for serverless back end APIs via Azure Function Apps) note that this is not a location where the static web is necessarily running
  • a GitHub or GitLab repo URL
  • the branch you wish to use to trigger production deployments (e.g. main)
  • a path to your code within your app (e.g. where your package.json file is located)
  • an output folder (e.g. dist) this should not exist in your repo
  • a project or personal access token for your GitHub account (alternatively you can perform an interactive OAuth2.0 consent if using the portal)

An example is shown here:

GitHub Actions

Using the consent provided (either using the OAuth flow or by providing a token), Azure Static Web Apps will automagically create the GitHub Actions workflow to deploy your application on a push or merge event to your repo. This includes providing scoped API credentials to Azure to allow access to the Static Web App resource using secrets in GitHub (which are created automagically as well). An example workflow is shown here:

Preview or Staging Releases

Similar to the functionality in analogous services like Netlify, you can configure preview releases of your application to be deployed from specified branches on pull request events.

Routes and Authorization

Routes (for SPAs) need to be provided to Azure by using a file named staticwebapp.config.json located in the application root of your repo (same level as you package.json file). You can also specify response codes and whether the rout requires authentication as shown here:

Pros

  • Globally distributed CDN
  • Increased security posture, reduced attack surface area
  • Simplified architecture and deployment
  • No App Service Plan required – cost reduction
  • Enables Continuous Deployment – incl preview/staging environments
  • TLS and DNS can be easily configured for your app

Cons

  • Serverless API locations are limited
  • Integration with other VCS/CI/CD systems like GitLab would need to be custom built (GitHub and Azure DevOps is integrated)

Overall, this is a good feature for deploying SPAs or PWAs in Azure.

if you have enjoyed this post, please consider buying me a coffee ☕ to help me keep writing!